Last year we helped our neighbor replace the planks on their deck. In exchange for our help they gave us what we wanted of the old wood. One of the projects we used the old wood for was a potting bench, which we talked about in an earlier post. This spring we used all the remaining wood to construct two new tall raised beds. The beds are 3 feet wide, 12 feet long and about 28 inches high.
Construction started on April 13. The first thing to do was cut all the planks to size and assemble the 12 foot long walls. This was done in the garage so the rain was not a factor. It actually snowed a few days later.
 |
| Construction Begins |
 |
| Deck planks transformed into walls |
Next we moved the sides one at a time to the back yard to assemble in place. It would be too heavy to move the completed bed by hand. Deck screws were used in the assembly. We then stapled landscape fabric along the inside of the beds to help keep the soil from seeping out the cracks between planks.
 |
| Adding the Ends |
Because of mole / vole issues we decided to purchase some hardware cloth to put on the bottom of the beds. It is much easier to do this before adding the dirt. :) I rolled the beds over and stapled the hardware cloth to the bottom. I was grateful that I made the beds 3 feet wide on the outside dimension and not on the inside dimension because then the 36" roll of hardware cloth fit nicely for stapling. This is something to consider when constructing your own beds.
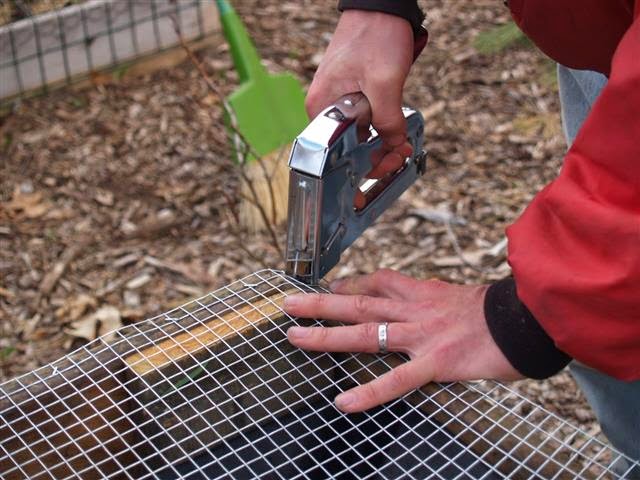 |
| Stapling on the hardware cloth |
 |
| Hardware Cloth on bottom, well top at the moment |
Next came figuring out how much soil / compost we needed to fill the beds. I used this website to calculate how many cubic yards I needed.
http://www.naturalgardeneraustin.com/cubic-yard-calculator.html
Because the bins were so high and to cut down on the amount of soil needed, we first filled the bottom with logs we had piled up previously. Some of which was from a tree that had fallen during a storm last winter. We then filled in the cracks with some wood chips we made previously when we borrowed a chipper to chip up some brush and pine trees we cleared to make room for some of the beds. This wood in the bottom serves a dual purpose. To take up space and add nutrients back into the beds as they break down over time. This technique is known as:
Hugelkultur.
 |
| Logs in the bottom to take up space and add nutrients |
 |
| Wood-chip Filler |
Thanks to IB Compost and our friend Tom who made 4 trips to haul 5.5 yards for us, we then filled the beds, one five gallon bucket at a time until they were full to the top.
 |
| Filler Up! |
Here is the completed beds (May 4th) with some rainbow Swiss chard transplanted into it. We plan to add more herbs and flowers soon. Some nice things about having tall raised beds is not having to bend down as much to tend to them, being out of reach of bunnies, and having plenty of root zone space as compared to other containers.
 |
| Small Beginnings |


