Sunday, November 27, 2016

TURKEYS!!

Well, yes turkey generally plays a major role in the festivities of this week but that is not really what I am going to share with you.  I am going to take you on a little time travel journey through this past summer and a family of turkeys who came and visited our yard.

While I know that turkeys live in our area and have seen them on occasion in the fields, crossing the road and foraging in the airport’s lawn, we have not seen them in our yard.  This is probably because we have had two dogs for the last 15 years and they have done an excellent job of policing the wildlife.  Sadly since they have gone, the deer and other smaller varmints have moved right in and made themselves at home among my smorgasbord of plants. Ahem, I’ll go back to my story of a more entertaining family and yet to be determined threat assessment to my garden.

So in July we were surprised by a female turkey called a hen with a flock of chicks.   I came home from errands and Sir T announced that we had visitors and showed me the pictures he took on the camera.  At this point we couldn’t get a good count of how many chicks there were yet.

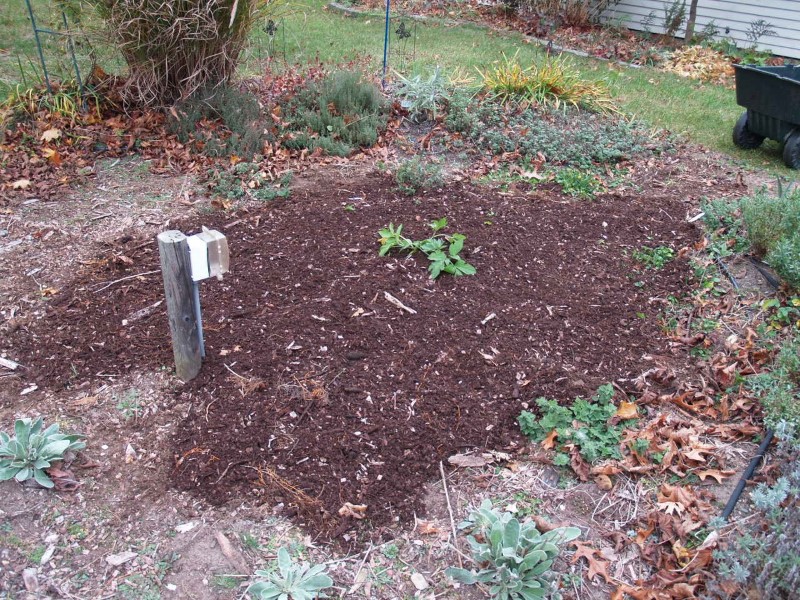
First official photo of the turkeys: July 6    For those interested in the flowers, there are delphiniums (purple),
onions (the balls), butterfly weed (orange), and lamb’s ear (silver).

The chicks ranged out around the mom in a semi-circle as they moved. 

Momma Turkey kept to a pretty regular schedule walking through our yard at least once in the morning coming from the west and then back through in the afternoon.  10 days later I was able to get some good pictures of her and the chicks. It was amazing to me how much they had grown in that short amount of time.  She was picking blueberries off the bush and eating them.  Since our bushes are short, she could reach most of what she wanted.  The chicks just jumped up in the air to get what they wanted.  It was funny and disconcerting at the same time.  Yeah, that is cute, but I want some blueberries too please!

Skittish upon our first meeting, me on the deck, Momma Turkey in the blueberries.  July 15

I think this picture is hilarious and a bit scary too.  Momma is not messing around.

Turkey feathers have beautiful coloration and are remarkably able to blend in at the same time.

As I like to hang my laundry out on the line to dry in the summer time, I often was out in the yard at the same time the little group wandered through.  Momma Turkey and I came to an uneasy truce in that she wouldn’t run away and I tried really hard not to be scary.  I would talk to her as I walked out to the line and hung up the clothes and then walked back.  By the end of summer I could get within 10 feet or so of her as I walked by without causing a ruckus.  I never tried to approach her or her babies directly and if I stayed up on the deck, she would simply eyeball me but not appear too anxious of me snapping pictures or just watching the daily parade.

The wedge formation the chicks traveled in is evident here.  

As the group walked, Momma would give soft vocalizations.  The main one seemed to be an “everything is good, keep moving” call that was a cooing sound.  This kept the group together as they slowly moved through the yard.   There were several other calls including a “danger” call and a “stay hidden” call.  The “stay hidden” call sounded like the pinging of radar on a submarine.

Apparently our whole yard was turkey land.  They ventured into the front yard as well.  July 22

I knew that turkeys could fly but had never witnessed this action.  Our neighbors have a cat who believes that our yard is his territory now that the dogs are gone.  We often find him sitting in random places around the house either being startled or startling us.  He never lets us approach him but leaves with a disgusted air of offence that we are running him off his land.

You can see the respect this cat has for us,
sticking his tongue out at me as I took his picture from inside the house with the zoom lens.

This cat is not a large cat but he seems to think he is entitled or hasn’t yet experienced the loss of one of his lives.  He would often lurk in our yard behind bed #12 attempting to intimidate the Momma turkey.  I don’t know if he thought it would fun to jump a chick or was just trying to impress the world with his king of the jungle persona.  In any case the chicks were almost as big as he was by this time.

Watching the stand-off from the deck, I even warned the cat that he was an idiot but he didn’t listen.  He didn’t back off and went towards a chick and Momma gave the alarm.  11 chicks headed for the trees in an impressive bustle of wings and chattering.  I was fairly impressed.  Momma went after the cat, he gave up and eventually she sounded the all clear.  Turkey chicks drifted down from all directions and proceeded on their way.

Later that week in a conversation with my neighbor, she was complaining about that mean turkey that bit her cat.  I almost laughed but managed to keep a straight face as I told her that her cat was not the victim in this case.  Apparently, in another altercation, the turkey took a chunk out of the cat’s backside.  The cat gave up messing with the turkeys after that.  Well, let’s just say, I did not see him in my yard again while the turkeys were around.

It took several weeks for us to determine just how many chicks there were in the group.  I would count and then miss one or come up with a different number 4 times in a row.  They never stayed still and also blended in so well that you could only see them when they moved.  We landed on 11 chicks or poults.  I have no idea if this is a “regular” sized group or not, but I was impressed.  That is a lot of babies to keep an eye one.  We quickly noticed that 9 of the chicks were front and center and turned out nicely and then there were the other 2.  One was a wanderer, going off in different directions or just exploring a tasty bit over here a tad longer than the rest and then would rush to catch up.  The last one, well, the only thing I can think of was his egg got dropped at some point.

He kinda forgot that he was a bird on occasion and his logic skills were a bit lacking.  The neighbor directly behind us puts out bird seed on the ground and the turkeys discovered this and added it to their weekly rounds.  His yard is completely fenced in but he would leave his gate open for the turkeys to come in.  He managed the walking in or in some cases flying in with his siblings and mom, but the leaving part was hard.  He didn’t exactly finish eating when Momma said to and so by the time he looked up, everyone was on the other side of the fence and he had no idea how to join them.

Turkey turned road runner   August 5

The poor guy ran back and forth next to this fence for about 20 minutes frantically yelling about the fact that he couldn’t get past it.  Momma and his siblings were all in the woods on the other side waiting for him.  Momma was patiently calling and he was responding, but nobody was going anywhere.

Hey turkey… you have WINGS…use them!

I watched and waited for him to get a clue and worried that all his yelling would attract something or Momma would give up on him.  After a bit I decided that I would go help remind him that he was a bird by scaring him.  I figured that if I got close to him, he would fly up into a tree to get away from me and that would break him out of the mental cage he had put himself in.  As I walked around the fence through the woods to get to him, I passed several of his siblings and Momma.  She eyeballed me but didn’t leave which I took as a good sign.  As soon as I got around the trees and he saw me, the turkey exploded in panic, popped himself over the fence, ran around me to his mom and everyone breathed a sigh of relief.  Off went the turkeys into the woods and back I went to my yard shaking my head.

Turkey naptime  August  16

The turkeys became comfortable enough in my yard despite me that they would rest for the afternoon in the sun.  I would often come out onto the deck and watch them, sometimes with my camera but more often not.  They would acknowledge my presence and keep an eye on me but go about their business slowly moving through the yard.  My understanding of what they appeared to eat was an omnivore diet.  They loved my blueberries and black berries but also seemed to be eating insects or plants as they moved through my yard with heads down hunting.  I do know that we did not seem to have many grasshoppers this year.  I don’t know if that was because of our rest year or if they ate them all.

Momma on patrol while the chicks walked with heads down hunting in the grass.

I am about 15 feet away snapping pictures.  These guys are old hands with the camera.

I have not researched how long chicks stay with the mother but this was one of the last times I saw her with the “kids”.  By now, the flock had lost the wanderer and the dropped egg babies.  A flock of 9 adolescent turkeys now traveled the daily route.  At this point in their lives, turkeys go from being called chicks or poults to a Jenny (female) or Jack (male).

The young’uns all look like their momma now.  August 27

Flock of 9 heading to the birdseed

I did not see the turkeys as often once they were on their own.  They also seemed to be much more interested in the birdseed than roaming through my yard in search of bugs.

One of my last turkey sightings  September 13

While we often joked about catching one or two to raise for thanksgiving, I don’t think we would have been able to do it.  It was so neat to watch them grow up so quickly.  I do not know if this group of 9 siblings will stay together or break up to mate outside of the direct family line.  I do know there is another large group of turkeys in the area and perhaps they’ll join up with them.  I have not researched much on turkeys but I do know that I would like to raise some of my own one day.

Bye guys!  Thanks for all the entertainment!


Sunday, November 20, 2016

Summer bulb preservation

Ok, I thought I should give you a proper HOW TO blog this week as I just dug up all my dahlias and canna and tender bulbs.  If you have these beauties in your yard and want to save them for next year, now would be the perfect time to dig them up.  Cannas hail from the tropical parts of America and dahlias (according to my brief research) are actually hardy at zone 6 or 7 and greater.  I believe that I would have to have quite a sheltered spot in my yard to attempt to over winter them in ground.  That being said, I do have Datura (zone 7) and gladiolas (zone 8 to 11 or 7 with protection) come back every year.  Perhaps next year I will run an experiment.

 I have quite a few dahlia plants that I started from seed several years ago.  Now these dahlias are not the big dinner plate types, but rather they have very pretty 3 inch sized blooms that cover the plant.   They are beloved by the bees and butterflies.  I also purchased a dahlia tuber on clearance this spring called Crazy Love.  It had a 4 – 5” flower.

Crazy Love bloomed until the frost killed it.  It looks like a lotus flower to me.  Lovely.

A honeybee on my dark pink seed raised dahlia.

The bumble bees did not seem to mind sharing with the other bees.
Often several bee varieties would be busy on the same flower.

My yellows were bright and cheerful.

This is my favorite color of the four colors of seed dahlias I have.
They do not have official names but I think of this one as sunrise.

We had a good hard frost a week or two ago and it killed all the foliage of the summer plants.  I let them get hit by the frost to kill the foliage back before I dig them.  It is easier for me to take care of them and something about the deadline of oncoming winter pushes me to get it done.  “If you wanna save them, you gotta do it now,” sort of thing.

I planted all my seed dahlias on the edge of the strawberry terrace.
Here they are telling me that they are ready to be dug up.

In the front herb bed where the pond was, I planted the Crazy Love dahlia along with a canna from my friend April out in Iowa and several Cape Flower bulbs which bloom in fall.  Really late fall actually.

Everything is dead… well, it looks dead.

My Cape Flower (Nerine bowenii) didn’t do much until late September and then it was gorgeous for almost 2 months until frost.

Alright, now you see why I think the work of digging up the bulbs and tubers are worth it.  The flowers are beautiful and are great for late summer blooms when a lot of the hardy perennials are spent.  Also because of the flat faces of my seed dahlias, they are excellent pollinator plants and that is important to me as well.

First I cut off the dead foliage to make it easier to manage the digging.

After brushing away the soil to find the tops of the tubers,
I gently work around the mass with my garden tiller tool to pull it out.

Lots of lovely fat tubers packed with damp soil. 

I brush off as much soil as I can using a small stick.

Cape Flowers send up their leaves in the spring, die back in the summer and then send up their flowers in the fall.
Their growth habit is similar to my Naked Ladies bulbs.

Cape Flower bulbs.  This is a good reason to label your plants as many times my different bulbs all look the same.

I went through the same process with my canna plant rhizomes.

Canna is wishing it lived somewhere warmer.

Trimmed back foliage and brushed off rhizomes of my red flowered canna.

Bulbs, rhizomes and tubers all drying overnight on my outdoor potting bench.

Once the various plants have been dug, I now need to cure them, or prepare them for their winter sleep.  I lay them all out somewhere they can dry nicely and any critters that may have hitchhiked along can run away.  Since I dug these on Thursday, the first of the very dry and warm last days of fall, I left them out for 24 hours.  I then brushed off any remaining dried soil and packed them away.

I use onion bags or orange bags to hold groups of the same kind of plant.  I also label whatever I do know.  I couldn’t remember the name of my purchased dahlia so I just labeled it pink and white and knew that I could look it up later and put the correct name on the tag as well.  The suggestion is to put them in a box with sawdust or straw to overwinter.  The goal is to not let them be damp but not let them dry out and shrivel up either.  A good balance which is sometimes hard to find.  I put them in waxed paper bags and fold over the top with a big paper clip and put them in my basement.  It has worked so far.

Well, that is pretty much it for how I dig and store my summer plants.  Next spring I will pull them out and replant them when the ground warms up enough.  I could start them early in pots but have found that the head start of a week or so of blooms isn’t worth the work, soil and space in the greenhouse.  Sometimes they even pout in the pot since they get root bound so fast.  Less work is good with me.

The other benefit of digging up my plants is that I make space for more bulbs and tidy up the beds.

The after of the Strawberry terrace

I love spring bulbs and I purchased about $25 worth on clearance (50% and later 75% off) but my biggest problem is where to put them.  Since we have taken out the pond, several scenarios have been discussed about what to do with the space.  I decided to go crazy and plant all the bulbs in the sunken hole left from all the compost rotting down.  Regardless of what we end up doing with that space, I will have a glorious display this spring.   I raked out the mulch, dug it a bit deeper and put in compost from my huge pile.

Layer 2 of 3 varieties of daffodil bulbs at 6” deep.  Layer 1 is alliums at 8” deep.

Layer 3 of 2 varieties of tulips at 5” deep.

Layer 4 of grape muscari and crocus at 3” deep.  I took handfuls of each bulb and tossed them in.
Then I turned them all right side up.  This helps make it more natural looking.

This is the definition of faith and hope to me.
By faith I put a bulb in the ground and I have hope for a beautiful future.
 
Finished front herb bed.  It too has been tidied all around the circle as well.

After burying all the bulbs I brought in woodchips to finish it off.  The ashitabi survived last winter in the big raised beds so I decided to plant it in the ground this winter and see how it does.  Since I am running out of space indoors, I am not bringing so many plants in this fall.  I even (gasp) composted a bunch.  I am going to cover the ashitabi and a silver sage plant (I put it in later next to the electrical box after I took the picture) with a pile of leaves for protection.

I will leave you with one last picture of fall.  My blueberry bushes turn the most amazing colors in the fall.  This is another reason why I think they are superior to an invasive burning bush.

Beautiful blueberry bush, not just for food!  


Indoors… Definitely indoors tonight

As I write this, the lovely 65 degree weather of the past two days disappeared in the gusts of wind which are now pelting my house with snow.  Yes, in the span of 16 hours or so, we lost 30 degrees and gained wind gusts in excess of 30 mph with white precipitation.

First snow of the season came with the assortment package of big fluffy flakes, sleet, pellets and tiny flakes.

I am so grateful that I was able to complete the majority of the outdoor tasks in the last two days and can safely and comfortably sit inside my lovely warm home without a huge list of outside to-dos.  My remaining task is to bury my hardy perennials in pots in the plant graveyard so they don’t freeze.  My how-to this month will briefly explore the why and the simple how to preserve potted perennials over winter.

My “graveyard” earlier this spring with a group of plants waiting in the wings.

Perennial plants overwintering in pots have to deal with colder temperatures on their roots and thus are more susceptible to cold damage.  The ground is a wonderful insulator and protects the roots from the harsher temperatures of the air as well as the wind effects on the air temperature.  I have learned that “planting” a plant in a pot in the ground keeps them happy.  Simply dig a hole the depth of the pot, plop said pot into hole and pack the soil, or sand in my case, back in around the pot and that’s it.  A load of leaves on top adds an extra blanket.  If you are not able to provide winter protection for a planted pot, the suggestion is to make sure the plant in question is hardy to several zones colder than the one you dwell in.

There are many reasons why a plant has to overwinter in a pot rather than in the ground.  Most of my reasons deal with the fact that I don’t have a place to put them yet.  A plant bought at the end of season on clearance, a plant that was removed and yet to be replanted, plants waiting to go in a designated spot but that spot isn’t open yet, gifted plants that need to be worked in and finally, my cuttings that are growing up in a pot before being transplanted into their permanent location are all inhabitants of this spot.

My pots waiting to go to bed.
The two big hostas in the foreground were taken out in the new path project on the east side terrace.

Sir T calls this area in my yard the plant graveyard because sadly, there are some plants that have languished years there and yes, some have died waiting for a home.  It isn’t a special spot, just some open sand in the former volleyball court, but it has been very helpful in holding plants over that I just haven’t gotten to yet or are still growing.

So while my plants are shivering outside waiting to get tucked into bed for the winter, I’ll take you on a tour of the inside of our house and the changes we did this past summer of no gardening.  Checking back on the blogs that I wrote earlier this year, I showed you the guest bedroom completion and the start of the demolition of the big room here.

I am so excited for the completion of my indoor garden space.  The process to unstick the adhesive was a long and laborious one mainly fought by Sir T who gallantly sat and scraped with a 4 inch blade and a heat gun… for hours every week for almost 3 months.  FINALLY, his labor of love gifted me with a clean cement floor to paint.

Mr. Right scraping away at the adhesive.
Bare concrete!  Now onto etching and cleaning!

Of course the painting was my job and I have no proof that I actually did it.  The usual story when the photographer is working.  While the scraping process was slowly progressing, Sir T took a break to make my potting bench.  I did have some specific requests for the bench but no absolute specifications.  Our final product went through several revisions before we had a workable and buildable design.  I knew that I wanted a large flat surface.  I tend to spread out and run out of space quite quickly.  I also knew that I wanted my bench to be nice enough to use for other purposes such as crafting, food display and eating.

The height of the bench needed to be comfortable for me to stand and pot up seedlings, the main purpose of the garden area, as well as transplant my house plants.  Under the bench, I desired to store soil in bins that were easily accessible and movable.  And finally it had to be pretty.  No small list of course.

My indoor potting bench in progress.
The shelves were sealed by my Dad for us and the wheels came from a furniture dolly bought on sale.

Sir T came through with a little help from my Dad and made me a beautiful bench.  I really love it.  In fact, I used it today to repot a rosemary plant for a visiting friend.  She lives in a camper and travels around the country with her family.  The plant was originally in a terra cotta pot and her husband mentioned that he would prefer her to move it to a less fragile pot for safety due to the bumpy nature of travel.  Ah ha, just a moment please!

Fetching a plastic faux terra cotta pot a couple of sizes up from its currently root bound pot, I whisked the rosemary and its new home off to the basement and reemerged minutes later with a nicely repotted plant.   No cold garage floor, crouching on the floor or digging through freezing soil on the kitchen table top needed.  It was WONDERFUL!!

My lovely bench.  I REALLY like it!  Top shelf of small bins for tools and pots.  Bottom shelf for bins of different kinds of potting soil.  The large brush is great for cleaning the soil and debris off into my designated compost bin.

The large room in the basement has only two fixed light sources, a half panel of 2 florescent bulbs on the north and south end of the room.  Not nearly enough light for my taste even during daylight hours.  Honestly, most of my working hours will probably be during the dark or doing projects that require more light.  Sir T solved this issue by installing lights above my potting bench.  He did not want to wire in lights above my bench but was rather more interested in something that could plug in.  A trip to Menards and touring around the lighting department with a very helpful and creative employee helped us settle on this configuration.

These plug in lights are called clamp lights and originally had a large clamp at the base of the reflector and were found in the work light section of the lighting department.  Sir T removed the clamps and arranged all the cords above the ceiling tiles, I peeled off the stickers and voila, industrial chic lighting for under $20 total.  Each light has its own on/off switch and are situated so that I do not have to work in my own shadow.

My beautiful new bench, new lighting, new floor and plants brought in for winter.
My avocado tree on the left and my papyrus plant on the right of the slider.
On the other side of the room I have my new shelves and light rack.

The shelving we bought holds more soil, trays, tools and my seed cabinet.  We upgraded from 4 plastic shoe box sized totes to the dark 3 drawer cabinet on the bottom shelf which I outfitted with center dividers.  All the seeds are sealed in bags and alphabetized.  Behind the white light shelf is a reflective “space” blanket to help keep as much light on the seedlings as possible.  The floor is a breeze to keep clean and it is easy to move the shelves on their wheels around.

A view down the hall to the bedroom.  The hallway wall got a fresh coat of paint as well.

I am so very pleased with my new space and am excited to put it to work.  I love the fact I have soil, space and pots at my fingertips for whenever I need them.  No more dragging bags of frozen soil in from the garage to thaw inside before repotting a plant on the kitchen table.   No more hunched over sitting on the floor transplanting hundreds of babies from the seed starting tray to cells.  No more mess in the kitchen.  Wonderful.

So as I sit here listening to the wind howl outside, I am smiling and looking forward to growing green things inside in my new space.  Blessed.  I am blessed.